Showing posts with label Rails. Show all posts

Friday, December 2, 2011

Sample Application

Just completed chapter 3 of Hartl's Raills Tutorial.  Only real change is adding haml to the mix. While haml does not seem to be officially part of Rails 3.1 I thought this would be a good time to add.

Chapter 3 is just about mostly static pages and adding rspec and autotest.

Code pushed to github.

Gemfile:

source 'http://rubygems.org'

gem 'rails', '3.1.3'

gem 'sqlite3'

gem 'haml', '~>3.1.4'

# Gems used only for assets and not required
# in production environments by default.
group :assets do
gem 'sass-rails', '~> 3.1.5'
gem 'coffee-rails', '~> 3.1.1'
gem 'uglifier', '>= 1.0.3'
end

group :development do
gem 'rspec-rails', '2.7.0'
end

group :test do
gem 'rspec-rails', '2.7.0'
gem 'webrat', '0.7.3'
gem 'spork', '0.9.0.rc9'
end

gem 'jquery-rails'

Saturday, November 26, 2011

Update on Redo

Well, there have been some upgrades while I took time off to work on iOS programming and my Ruby teaching material.

RVM

$ rvm --version
rvm 1.9.2 by Wayne E. Seguin (wayneeseguin@gmail.com) [https://rvm.beginrescueend.com/]

Ruby

$ ruby --version
ruby 1.9.3p0 (2011-10-30 revision 33570) [x86_64-darwin11.2.0]

Rails

$ rails --version
Rails 3.1.3

RubyMine

I decided to try RubyMine 4.0 EAP instead of version 3.x.

Use the normal techniques from Hartl's tutorial to setup ruby and rails.  You just had use the appropriate version numbers when setting up Ruby and Rails.

Once everything is installed, just start up RubyMine and use Preferences to setup git and the default Ruby / Rails environment to use.

I setup a new directory for these projects and then created first_app from the tutorial using RubyMine. I did compare to hand generated version and they were the same so I am feeling comfortable with this version of RubyMine.

Thursday, September 15, 2011

Redo Rails 3.0 Tutorial in 3.1 using Rubymine

First Steps

This is the first of a series of blogs about my experiences redoing Michael Hartl's Rails 3.0 Tutorial in 3.1.  He published a 13th chapter that basically says try to move a file at a time from the completed 3.0 sample application until you get it working.  I am going to take a different approach.  I am going back to the beginning of the sample app and create it from scratch using Rails 3.1 and Rubymine. The only thing I will start with is all the gems needed.  Below is the Gemfile:

I did the original tutorial using several editors: Vim, Textmate, BBEdit, and Aquamacs. Each had its features and problems. None of them could be classified as a full featured IDE.  I have done enough large enterprise projects using Java that realize the value of an IDE. Even in my Smalltalk days the VisualWorks editor could be classified as an IDE, and it was a dynamically typed language also. So I decided to try Rubymine.

The first step was getting Rails 3.1 installed. There was my first surprise.  I had upgraded the Mac OS to Lion and upgraded Xcode since the last time I had tried to install a new version of Ruby or Rails.  The install failed and it turned out I needed to install the rest of Xcode so that gcc would be put in /usr/bin as well as /Developer/usr/bin/gcc.

So here is my starting environment:

  • Ruby 1.9.2p290
  • rvm 1.8.3
  • Rails 3.1.0
  • rake 0.9.2
  • All the gems in Gemfile as well.

First step is install Ruby 1.9.2p290, make sure that gem and rake is up-to-date.  Then use rvm to setup a dedicated gem set.

In Rubymine set the Ruby SDK and gems
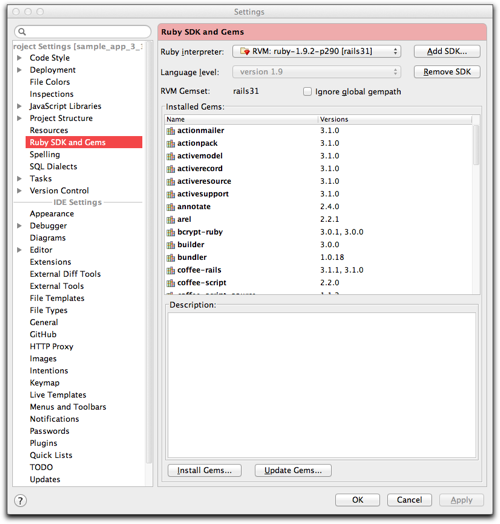
Ruby SDK and Gems

Then create a new Rails project.

First step in creating Rails project

Note we are skipping Test::Unit files.

Second step in setting up Rails project

Then setup the Gemfile and use Tools menu to Bundle install.

Now to use Rspec.  First one needs to [Reload generators list] to load the rspec:install generator (it is there because of the Gemfile but the install did not update the generators list). Then select spec:install
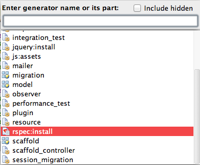
Screenshot 03

And no arguments

Screenshot 04

My .gitignore file looks like this

.bundle
db/*.sqlite3
log/*.log
tmp/
.sass-cache/
webrat.log
*.swp
*~
.DS_Store
.idea/*

We now have the base to build on and we are ready to make our first git commit.  The Version Control menu includes a menu item for initial setup.  By selecting the git init you can put the entire directory under git version control. Once I used git init version control menu items changed to support git. See Rubymine's online documentation. All that was left was adding the files and doing the initial comment.

The uncommitted files:
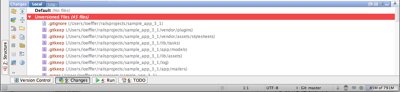
The unversioned files

After adding files and switching to folder view:
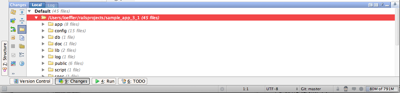
Files added before commit in folder view

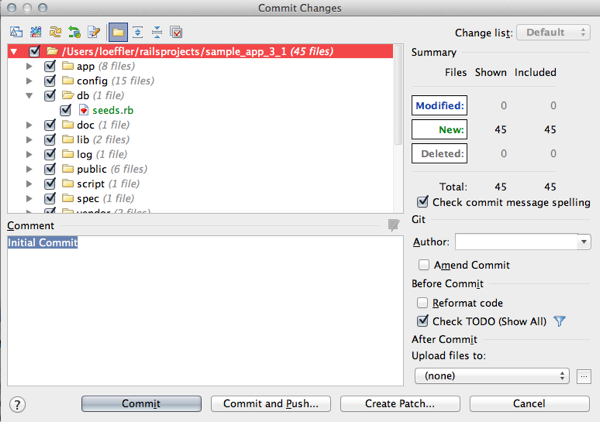
Commit window:

Initial commit window

Saturday, November 20, 2010

JAVA EE 6 or Ruby On Rails 3?

This is an interesting question for me.  I just finished 3 major Java EE projects.  One was an existing J2EE project and was kept that way.  But the year before I did a Java EE 5 project (2005-2006) and it was a much easier to implement due to improvements in Java EE.  I redid that application in 2009-2010 (6 months) in Java EE 6 with a lot less effort and much easier to maintain.

So why would I care about Ruby on Rails 3?  There are lots of reasons.  Mostly it is intellectual  curiosity.  Another is that I am not a one-size-fits-all kind of guy.  So I am kicking back and reading a great tutorial by Hartl and finding the new Rails is much easier to pick up than when I first tried version 1. I have skimmed a number of Ruby books and from my background with Flavors and CLOS in Lisp and Smalltalk I find Ruby pleasing.  I am not a big fan of all the type checking in Java but it has some good points. Then I picked up on a book on metaprogramming in Ruby and bingo, the ability to do things at runtime that I loved in Lisp are back.  The book is Metaprogramming Ruby: Program Like the Ruby Pros by Paolo Perrotta.  This book has really accelerated my understanding of to use Ruby and just how some of the great gems work.